

Why Knife Skills Are the Foundation of Home Cooking
Most home cooks spend more time at the cutting board than anywhere else in the kitchen. Yet basic knife technique is almost never taught — most people simply pick up habits by watching others or figuring it out under pressure. The result is slow prep, inconsistent cuts, and, occasionally, close calls with fingers.
You don't need to train like a line cook to improve. A handful of techniques — applied consistently — will make your prep noticeably faster, more uniform, and meaningfully safer. If you're just getting started in the kitchen, knife skills are one of the first things worth locking in. They underpin almost everything else you'll cook.
This guide focuses on the practical fundamentals: how to hold the knife, how to protect your non-dominant hand, and which cutting motions handle the widest variety of ingredients.
What you will need
What You'll Need Before You Start
You don't need a full knife block. For the vast majority of home prep, a single well-maintained chef's knife is sufficient. See our guide to kitchen equipment that earns its place for what to look for when choosing one.
Chef's Knife (8-inch)
The workhorse of the kitchen — handles slicing, chopping, and mincing across nearly every ingredient type.
Large Cutting Board
Provides a stable, spacious surface that reduces cramped, rushed cuts.
Honing Rod
Realigns the knife's edge before use, maintaining sharpness between sharpenings.
Paring Knife
Useful for smaller, more precise tasks like peeling or trimming where a chef's knife is too large.
One overlooked detail: place a damp paper towel or kitchen towel under your cutting board before you start. It prevents the board from sliding — a small step that makes a real safety difference.
Core Techniques, Step by Step
Work through these steps in order. The first two — grip and hand position — are the basis for everything that follows. Don't skip ahead to the cuts until both feel natural.
Use the Pinch Grip
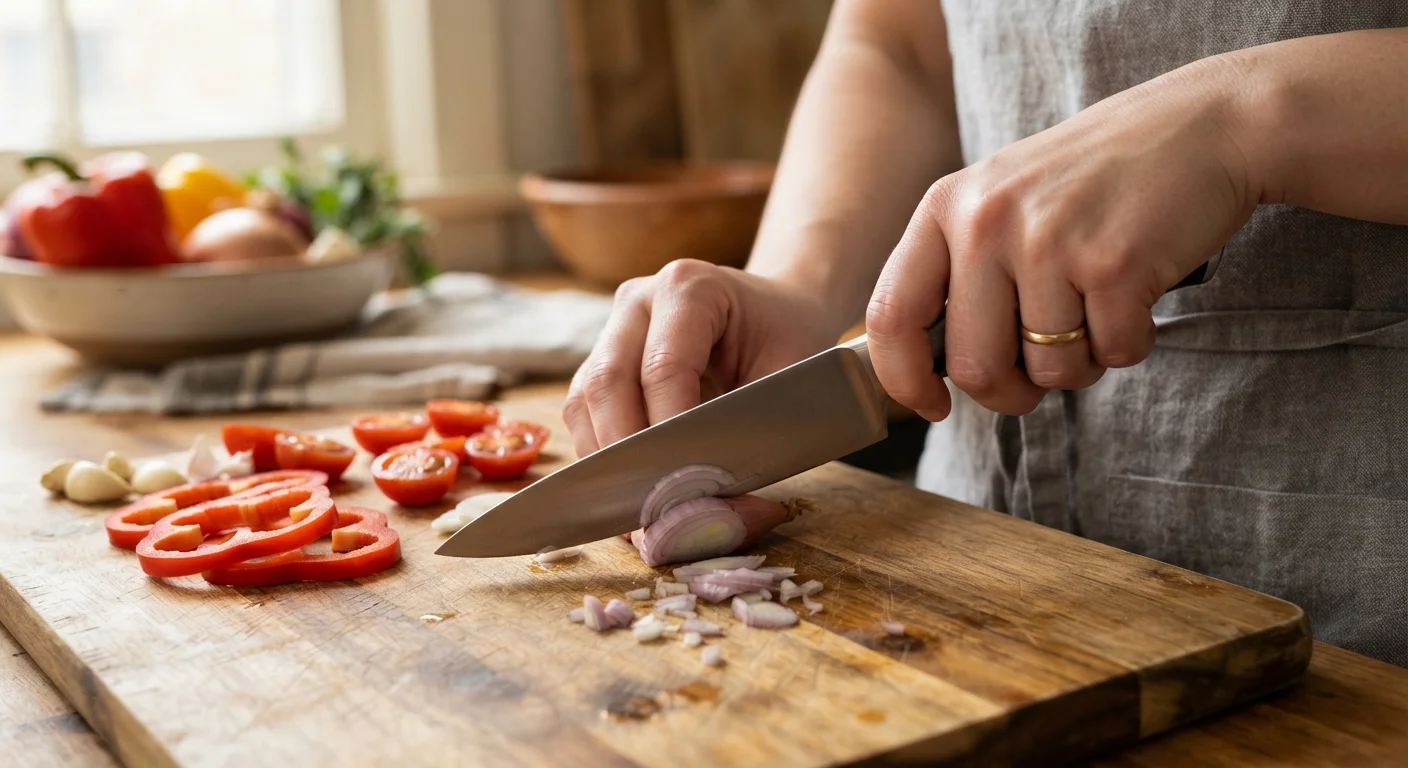
Grip the blade itself — not just the handle — by pinching the flat sides of the blade between your thumb and the side of your index finger, right where the blade meets the handle. Your remaining three fingers wrap around the handle naturally.
This grip may feel unnatural at first, but it gives you direct control over the blade's direction and dramatically reduces the chance of the knife twisting mid-cut. It also reduces hand fatigue during longer prep sessions.
Form the Claw Hand
Your non-dominant hand holds the food — and it needs protection. Curl your fingertips under so your knuckles form a vertical wall facing the blade. The flat side of the blade rests lightly against your knuckles as you cut, guiding each slice while your tucked fingertips stay safely out of the path of the edge.
This is called the claw grip. Move your claw hand backward with each cut to advance through the ingredient at a controlled pace.
Master the Basic Slice
For most vegetables and proteins, a straight slice is your default motion. Anchor the tip of the blade lightly on the board, then draw the heel of the knife down and slightly back through the ingredient in a smooth, forward-and-down motion. Let the blade do the work — don't press straight down.
This technique works well for tomatoes, chicken breast, cooked meats, and soft vegetables.
Learn the Rocking Chop
The rocking chop is ideal for herbs, garlic, and rough chopping tasks. Keep the tip of the knife in contact with the board and rock the blade up and down in a fanning arc, moving your claw hand to guide the food under the blade.
For herbs like parsley or cilantro, gather them loosely into a pile and chop in overlapping passes, rotating the pile occasionally to get an even mince.
Practice the Push Cut for Harder Vegetables
Root vegetables like carrots, parsnips, and potatoes resist slicing because of their density. For these, use a push cut: position the blade at the top of the ingredient and push the knife forward and down through it in one deliberate stroke.
First, create a flat surface by halving the vegetable lengthwise — this removes the rocking instability of a rounded bottom and makes every subsequent cut safer and more controlled.
Consistency Comes From Repetition
Don't expect perfect uniformity in your first few attempts. Even experienced cooks have unevenly diced onions. The goal is deliberate, controlled practice — work through your normal prep using these techniques rather than setting aside separate practice sessions. Within a few weeks of consistent cooking, the grips and motions become automatic.
Once you're comfortable with these techniques, you'll find that recipe prep becomes more predictable. Pairing good knife skills with solid pre-cooking prep habits is one of the most effective ways to reduce mid-meal stress.
Keeping Your Knife — and Your Kitchen — Safe
Knife safety doesn't end at technique. A few habits keep your tools in good shape and your kitchen safer overall.
Keep your knife sharp. A dull knife forces you to apply more pressure, increasing the chance of slipping. You don't need to sharpen frequently — honing the blade with a honing rod before each use maintains the edge between sharpenings. Have the knife professionally sharpened, or use a pull-through sharpener, a few times a year depending on how often you cook.
Store knives properly. Loose knives in a drawer dull quickly and pose a hazard when you reach in. A knife block, magnetic strip, or blade guard are all practical options.
Never put a good knife in the dishwasher. The high heat and harsh detergents accelerate corrosion and damage the handle over time. Hand-washing and immediate drying keeps a knife in good condition far longer.
Good knife hygiene also connects directly to food safety. Always wash your knife between cutting raw proteins and produce — cross-contamination is one of the leading causes of foodborne illness at home. Our food safety habits guide covers this in more depth.
The content on this site is for informational purposes only and is not a substitute for professional advice. Always consult a qualified professional for guidance specific to your situation.